


What Happens If Wardrobe Doors Don't Fit
Table of Contents
- Why Wardrobe Doors Don't Fit: Common Causes
- How to Adjust Wardrobe Door Hinges
- Measuring for Made-to-Measure Wardrobe Doors
- How to Install Sliding Wardrobe Tracks on Carpet
- Checking Frame Square and Level
- Common Installation Mistakes to Avoid
- What to Do When Doors Still Don't Fit
- Frequently Asked Questions
Last Updated: September 2, 2026
Why Wardrobe Doors Don't Fit: Common Causes
When wardrobe doors don't fit properly, it's rarely a manufacturing fault. The problem almost always lies in how the space was measured, prepared, or understood before installation. At DoorsDirect, we've seen thousands of installations succeed and fail, and the pattern is consistent: doors that don't fit are a symptom of something else going wrong upstream.
The most common culprit is an out-of-square or uneven room. Walls that look straight to the naked eye often aren't. Floors that appear level can slope by several millimetres across a bedroom (peer-reviewed research). Ceilings can be higher on one side than the other, especially in older properties or loft conversions. When your cabinet frame doesn't sit square and level on these imperfect surfaces, the doors, which are manufactured to precise tolerances, won't close properly or will sit at odd angles.

Installation errors compound this. Fasteners driven in at the wrong angle, shims placed unevenly, or the cabinet box not fully secured to the wall all create misalignment that shows up in the doors. Warping of the cabinet carcass itself, usually from moisture or structural settling, changes the internal geometry the doors depend on. Even minor warping, a few millimetres, is enough to create binding, rubbing, or gaps. Floor leveling is another frequently overlooked factor. Fitted carpets and underlay can hide significant dips or rises in the floor itself. When you place a wardrobe on an uneven floor, the cabinet box tilts, and the hinge arms that support the doors no longer hang vertically.
Most of these problems are preventable with proper measurement and preparation, and many can be corrected after installation with hinge adjustment and careful shimming.
How to Adjust Wardrobe Door Hinges
Hinge adjustment is your first line of defence when wardrobe doors don't fit. Most sliding wardrobe hinges offer three planes of adjustment: vertical (up and down), lateral (side to side), and depth (forward and back).
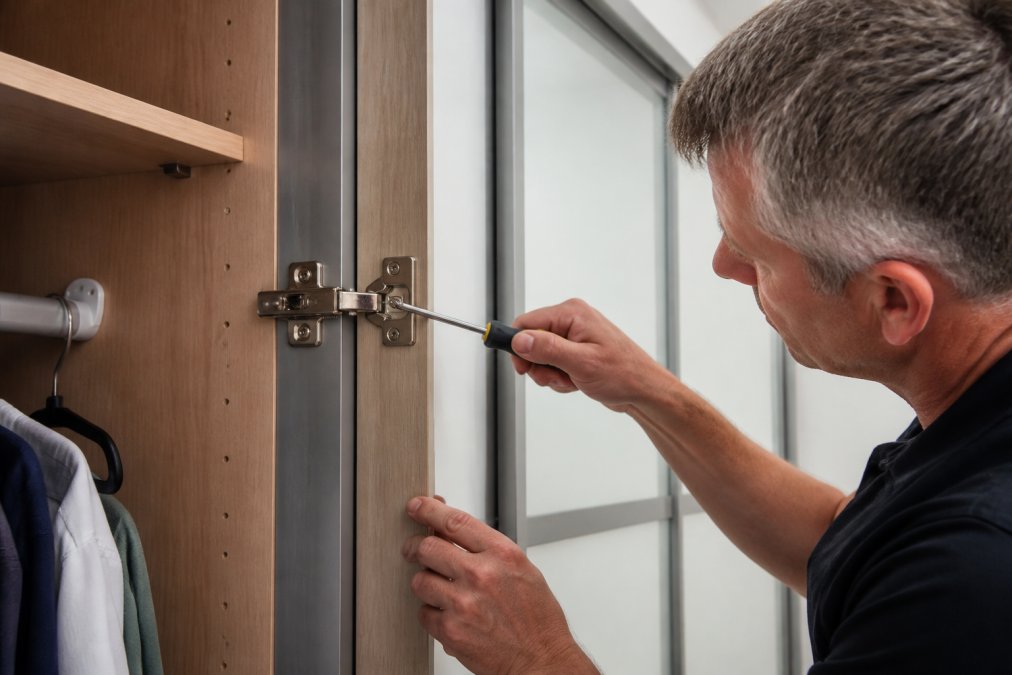
Vertical adjustment is controlled by the top and bottom hinge screws. Turning these screws clockwise raises the door; turning them anticlockwise lowers it. Loosen the screw slightly, just enough that the door moves under its own weight, then tighten once it's in the correct position. Never over-tighten; you want the door to sit snugly but not be forced.
Lateral adjustment moves the door left or right along the track. The lateral screw is usually located on the hinge arm itself, often on the side facing the track. A quarter turn can move the door several millimetres. If your door is rubbing on the frame on one side, lateral adjustment will cure it. Make small adjustments, a half-turn at a time, and test the door's movement between each adjustment.
Depth adjustment pulls the door forward or pushes it back. This is less common on standard sliding wardrobe hinges, but some premium systems offer it. Depth issues usually indicate that the hinge arm itself is bent or that the mounting plate has shifted.
Always adjust vertical first, then lateral, then depth. Start with the top hinge, then the bottom. After each adjustment, open and close the door fully several times to ensure it moves freely and closes properly. Over-tightening the adjustment screws creates friction that wears the mechanism and can cause the door to jump off the track.
Measuring for Made-to-Measure Wardrobe Doors
Precision in measurement is non-negotiable. Made-to-measure doors are built to your exact specifications, which means a 5mm error in measurement becomes a 5mm problem in fit. The measurement process has three stages: the rough opening, the finished frame, and the door reveal.
The rough opening is the space in your wall where the wardrobe will sit. Measure this at the top, middle, and bottom. If these three measurements differ by more than 10mm, your wall is out of plumb. Measure the width the same way: left, centre, right. Check the depth of the recess from the back wall to the front edge of any existing skirting board or obstruction.
The finished frame is what the doors will close against. The frame must be square and level before you measure for doors. Place a spirit level on the top edge; if the bubble isn't centred, the frame is tilted. Check the sides for plumb the same way. If the frame is out of square, you can either shim it until it's square, or measure the frame as it actually sits and have your doors made to fit the out-of-square opening.
The door reveal is the gap between the closed door and the frame edge. Standard reveal is 2-3mm on each side. Measure the reveal at multiple points and note where it changes.
Building Standards guidance on measuring for fitted furniture emphasises the importance of checking the wall for plumb and square before installation.
Use a steel tape measure, not a fabric one. Measure twice, record the measurements, and measure a third time to confirm. DoorsDirect provides detailed measurement guides for every wardrobe type, and our team can review your measurements before you order to catch errors early.
How to Install Sliding Wardrobe Tracks on Carpet
Installing sliding wardrobe tracks on carpet is trickier than on hard flooring, because carpet and underlay compress under the weight of the track and the doors. This compression can cause the track to settle unevenly, throwing the doors out of alignment weeks or months after installation.
The solution is to remove the carpet and underlay in a strip where the track will sit. Cut away the carpet and underlay in a line exactly where the bottom track will run. This line must be level and free of debris. If the floor underneath is uneven, use a self-levelling compound or floor shims to create a flat surface.
Once the floor is flat and solid, install the bottom track according to the manufacturer's instructions. Use appropriate fasteners, usually heavy-duty screws or bolts, and space them no more than 300mm apart. The track must be secured firmly to the floor, not just resting on it. After installation, lay new carpet around the track, or butt the existing carpet against it.
The top track is equally important. It must be level and parallel to the bottom track. Use a spirit level to check the top track after installation. If it's out of level, the entire wardrobe system will perform poorly.
Checking Frame Square and Level
A square, level frame is the foundation of every wardrobe installation. If the frame is out of square or level, no amount of hinge adjustment will fully correct the problem.
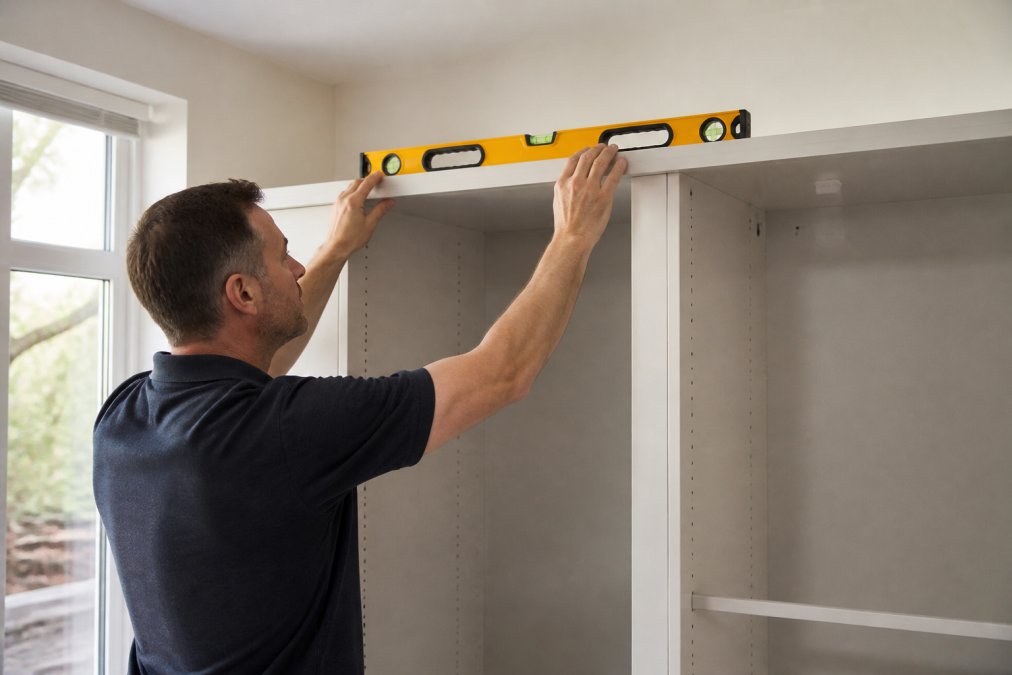
Start with the top edge. Place a spirit level on the top of the frame and check for level in both directions: front to back and left to right. The bubble should be centred. If it's not, the frame is tilted.
Next, check the sides for plumb. A plumb line or a spirit level held vertically should show no deviation from top to bottom. If the sides are out of plumb, the cabinet is leaning, which changes the angle at which the hinge arms hang.
Check the back of the frame if it's accessible. Place a level against the back edge to ensure it's plumb. Finally, check that the frame is square by measuring the diagonals. Measure from the top-left corner to the bottom-right corner, then from the top-right to the bottom-left. These measurements should be equal. A difference of more than 5mm indicates a problem that needs correction before doors are installed (iso.org).
If the frame is out of square or level, use shims to correct it. Shim gradually, checking level and plumb frequently, until the frame is true. Once it's correct, secure the frame to the wall with appropriate fasteners.
Common Installation Mistakes to Avoid
The mistakes that lead to wardrobe doors not fitting fall into predictable patterns.
Skipping the floor preparation is the most common error. Installers assume the floor is level because it looks level, then install the track without checking. Within weeks, the carpet compresses or the floor settles, and the track is no longer level. Always check the floor with a level and remove carpet and underlay where the track will sit.
Not checking the wall for plumb leads to the cabinet being installed at an angle. The hinge arms hang at an angle, the doors don't close properly, and adjustment can only partially correct it.
Over-tightening fasteners pulls the cabinet frame out of shape. The frame becomes racked (twisted), and the doors no longer fit. Fasteners should be snug but not over-torqued.
Ignoring warping in the cabinet carcass is another common oversight. Chipboard warps when it absorbs moisture. Check the carcass for warping before installation by placing a straight edge across it and looking for gaps.
Measuring only once leads to errors that could have been caught. Measure each dimension at least twice, preferably three times.
Not accounting for the door reveal causes doors to appear misaligned even when they're properly hung. Measure the reveal carefully and adjust the hinges to achieve consistent reveal all around.
What to Do When Doors Still Don't Fit
If you've adjusted the hinges, checked the frame, and the doors still don't fit properly, the problem is likely structural: the frame is warped, the room is significantly out of square, or there's a settling issue in the building itself.
Start by identifying exactly where the door is binding or gapping. Close the door slowly and watch for the point where it first makes contact with the frame. Is it rubbing on the top, bottom, or side? Is the gap even all around, or does it vary?
If the door binds at the top on one side and at the bottom on the other side, the frame is racked. The fix is to remove the doors, remove the frame, and reinstall it square.
If the door binds uniformly along one edge, the frame may be out of plumb on that side. Check with a level. If it is, shim the frame until it's plumb.
If the gap is uneven, the frame may be tilted. Check with a level in both directions. If the frame is tilted, shim it until it's level.
If the cabinet carcass is warped, minor warping (less than 3mm) can sometimes be corrected by adjusting the hinges and shimming the frame. Significant warping usually requires replacing the carcass.
If the room itself is significantly out of square, a difference of more than 10mm across the width, you may need to have the doors made to fit the room as it is. DoorsDirect can manufacture doors to fit rooms that are out of square, out of level, or otherwise non-standard. When standard solutions aren't working, get a second opinion.
Wardrobe doors that don't fit are frustrating, but they're almost always fixable. The key is understanding what's actually wrong, which requires honest measurement and diagnosis, and then addressing the root cause, not just the symptoms. DoorsDirect's made-to-measure approach means we can build doors to fit almost any space, including those that are out of square, sloped, or otherwise challenging. Our three-stage quality check process and ten-year guarantee ensure that when your doors arrive, they're built to the exact specifications you've provided. If you're working with a non-standard space or you're uncertain about measurements, our team can guide you through the process. Get started with DoorsDirect and transform an awkward space into perfectly fitted storage that works flawlessly.
Frequently Asked Questions
My wardrobe doors are misaligned. How can I fix them?
Start by checking if the cabinet frame is level and square using a spirit level. If the frame is plumb, adjust the hinge screws: turn the top hinge screw clockwise to lift the door or anticlockwise to lower it. For lateral movement, adjust the mounting plate screws. If gaps remain after hinge adjustment, the frame itself may be warped or the floor uneven. In these cases, shims under the cabinet base or strike plates against walls can compensate for irregularities.
What happens if my wardrobe doors don't fit after delivery?
Made-to-measure doors are built to your exact specifications, so poor fit usually signals a measurement error or structural issue with the installation space. Check that the cabinet is level and square, and verify your original measurements. If the frame is genuinely out of square or the floor uneven, adjustments to hinges, tracks, and shims can often correct the fit. DoorsDirect offers expert guidance throughout the process, contact support if doors arrive misaligned or if your space has unexpected irregularities.
How do I measure for made-to-measure wardrobe doors correctly?
Measure the width at the top, middle, and bottom of the opening, use the smallest measurement. Measure height on both the left and right sides. Check that corners are square using a set square or by measuring diagonals. Account for floor slope, wall irregularities, and skirting boards. If your space has sloped ceilings, alcoves, or uneven walls, note these details when ordering. Providing accurate measurements and photos of awkward features ensures DoorsDirect can design doors that fit perfectly, even in challenging spaces.
Why do sliding wardrobe doors keep coming off the track?
Doors derail when the bottom track is not properly secured, especially on carpet where the track can shift under weight. Ensure the track is anchored firmly to the floor using appropriate fasteners, not just resting on the carpet. Check that the track is level; if the floor is uneven, use shims to level it before installation. Inspect the hinge arm and soft-close mechanism for damage or friction. Regular maintenance, including checking screw tension monthly, prevents derailment. A ten-year guarantee should cover mechanical failure, but proper installation and floor preparation are essential.
This article was written using GrandRanker
Leave a comment