


How to Install Sliding Wardrobe Doors: Step-by-Step
Table of Contents
- What You Need Before Installing Sliding Wardrobe Doors
- Tools Needed for Wardrobe Door Installation
- How to Measure for Sliding Wardrobe Doors
- Fitting the Top and Bottom Tracks
- Installing Wall Liners, End Panels, and Sliding Wardrobe Doors
- Adjusting Sliding Wardrobe Doors After Fitting
- Weight Capacity, Door Materials, and Long-Term Maintenance
- Conclusion
Last Updated: August 14, 2026
What You Need Before Installing Sliding Wardrobe Doors
Installing sliding wardrobe doors rewards careful preparation far more than raw skill. Get the groundwork right, and the rest follows logically. The single biggest mistake is starting before the opening is properly assessed.
Before ordering or beginning installation, you need to understand your space: floor condition, ceiling height, wall plumb, and any structural elements affecting track positioning. The first decision is whether doors fit into an existing alcove, across an open wall, or into a purpose-built frame. Each changes the installation sequence.
Made-to-measure sliding wardrobe doors are manufactured to your exact opening dimensions, so measurements must be precise before ordering. Check the following:
- Whether the floor is level across the full opening width
- Whether the ceiling is flat and horizontal
- Whether the side walls are plumb and square
- The finished floor height if laying new flooring before fitting
- Whether skirting boards, coving, or cornices need removing
According to Chartered Institute of Building guidance on domestic fit-out, proper pre-installation assessment is the most frequently skipped step in domestic joinery projects and the most commonly cited cause of rework.
Tools Needed for Wardrobe Door Installation
The right tools make this installation manageable. Here's what you need for a standard sliding wardrobe door installation:
| Tool | Purpose |
|---|---|
| Tape measure | Measuring opening width, height, and depth |
| Spirit level | Checking tracks and panels are true |
| Plumb line | Verifying vertical alignment of side walls |
| Pozidrive screwdriver | Fastening track screws and panel fixings |
| Masonry drill bits | Drilling into brick or concrete walls |
| Wall plugs | Securing fixings into masonry |
| Bradawl | Marking pilot hole positions accurately |
| Hacksaw | Cutting tracks to length if required |
| Pencil | Marking positions on walls, floor, ceiling |
| Step ladder | Reaching the ceiling for top track fitting |
A spirit level is non-negotiable. Tracks that aren't perfectly horizontal cause doors to drift open or closed under their own weight. A plumb line verifies vertical alignment before committing to fixings.
For masonry walls, use masonry drill bits matched to your wall plug size. Soft plasterboard walls require cavity wall anchors or toggle bolts instead.
How to Measure for Sliding Wardrobe Doors
Accurate measurement is the foundation of successful installation. Measuring correctly involves taking multiple readings at different heights and positions, then using the most conservative figure.
Opening width: Measure across the opening at three heights: near the floor, at mid-height, and near the ceiling. Use the narrowest measurement as your reference width.
Opening height: Measure floor to ceiling at three points: left side, centre, and right side. Use the smallest figure. If there's more than 10mm variation, you have a floor or ceiling levelling issue to address before proceeding.
Depth: The opening needs sufficient depth to accommodate door panels when open. For a standard two-door system, each door needs roughly half the opening width in depth to slide clear.
Write every measurement down and sketch the opening with all readings noted. This sketch becomes your order reference and installation guide.
Dealing with Uneven Floors and Sloped Ceilings
Uneven floors are common, particularly in older properties and loft conversions. The bottom track must sit level, regardless of what the floor beneath it is doing.
Use a packing strip beneath the bottom track, a thin strip of timber or plastic shimmed to bring the track level. Check with your spirit level as you go. The gap can be covered with matching trim or silicone bead.
Sloped ceilings in loft conversions require different solutions. Standard floor-to-ceiling systems assume a horizontal ceiling. Either fit the top track at the lowest point and accept reduced height, or order made-to-measure doors designed for the slope. DoorsDirect offers bespoke solutions including doors cut to follow a ceiling angle.
Fitting the Top and Bottom Tracks
Track fitting is where the installation becomes structural. The top and bottom tracks carry the entire weight of the doors and govern how smoothly they run.
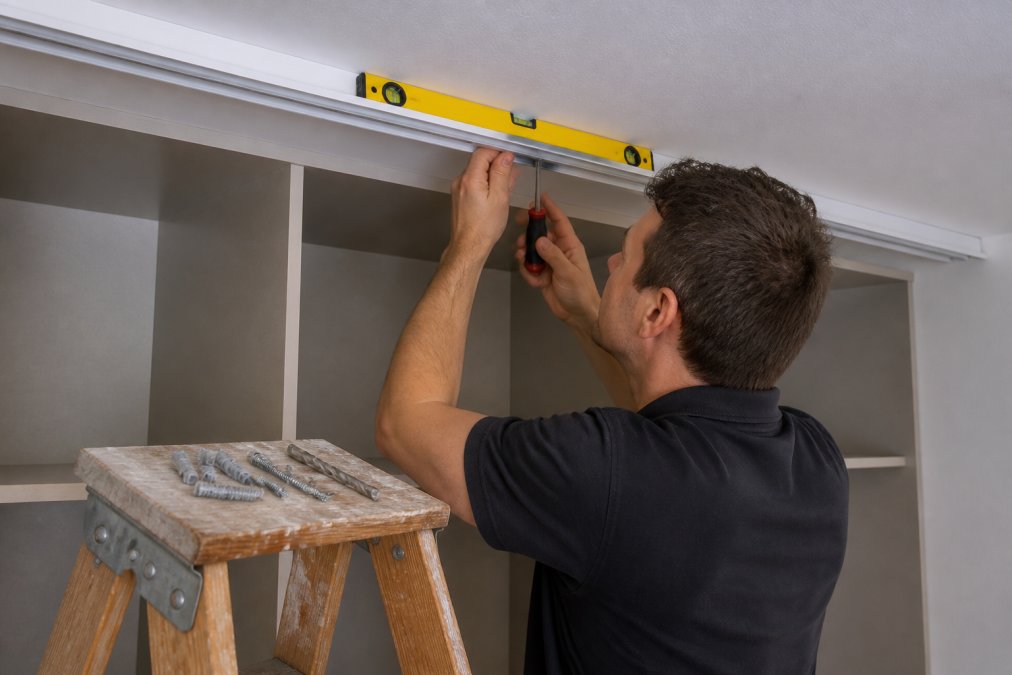
Securing the Top Track
Position the top track first and mark its intended position on the ceiling using a pencil. Check it with your spirit level across the full width, the track must be perfectly horizontal.
Mark fixing hole positions using a bradawl. Drill into the ceiling with the appropriate bit for your ceiling type: masonry bits for concrete, standard wood bits for timber joists. If fixing into plasterboard between joists, locate joists first with a stud detector and fix into them wherever possible. Use appropriate plasterboard anchors where joist fixing isn't possible.
Insert wall plugs into masonry fixings before driving screws. Use a pozidrive screwdriver rather than a power drill for final tightening to avoid over-torquing. Once fixed, recheck the level. The track should not flex when you apply moderate hand pressure along its length.
Fixing the Bottom Track
The bottom track must sit directly below the top track. Use a plumb line dropped from the top track's front edge to position it accurately. If offset, the doors will run at an angle and bind.
Mark fixing positions, drill, plug, and screw as with the top track. The bottom track typically sits flush with the finished floor surface. If using a packing strip to level an uneven floor, the track fixes through the strip and into the subfloor.
Check the spacing between the front and back channels of the bottom track. This spacing must match the door panel thickness specified by your manufacturer. According to BSI guidance on domestic joinery tolerances, track and panel tolerances in domestic sliding systems should be verified before installation to prevent binding or excessive play.
Installing Wall Liners, End Panels, and Sliding Wardrobe Doors
With both tracks secured and level, fit the wall liners and end panels that form the sides of the wardrobe opening. Wall liners cover internal side walls of an alcove and create a finished surface. End panels are freestanding vertical panels used in open-wall installations where there's no existing side wall.
Fit wall liners by scribing them to the side wall surface. Hold the liner in position and use a scribing block to trace the wall profile onto the panel face. Cut along the scribe line with a jigsaw, then refit. The panel should sit flush against the wall with no gaps.
End panels are typically fixed to the floor and ceiling using dedicated brackets. Check they are plumb before fixing permanently.
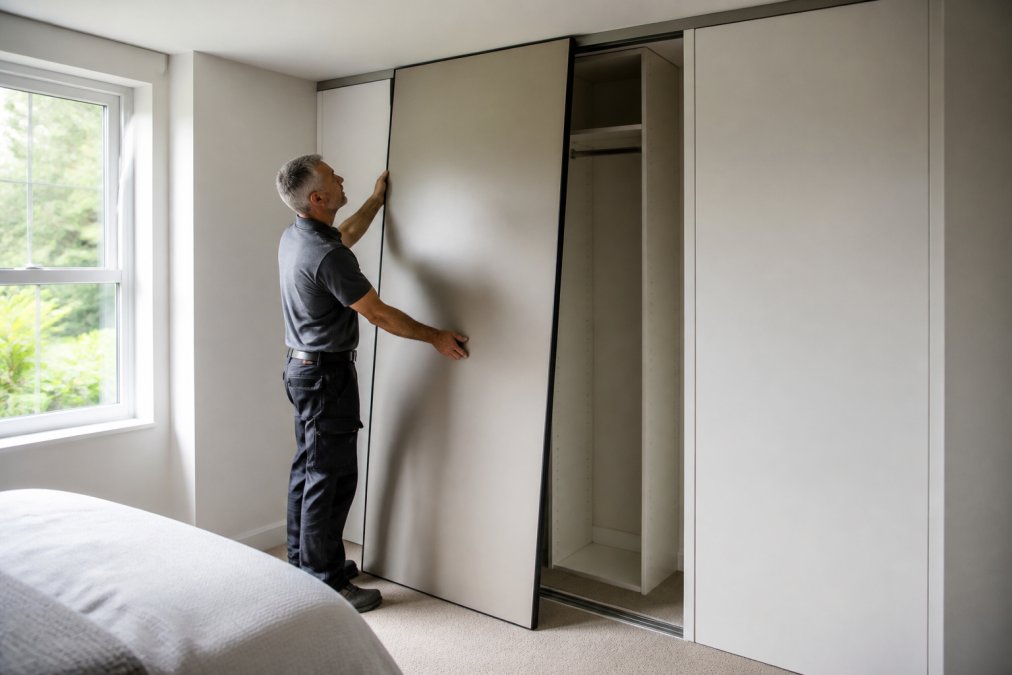
Once liners and end panels are in place, insert the sliding wardrobe doors:
- Tilt the top of the door panel toward the top track and hook the door rollers into the rear channel
- Swing the bottom inward and locate the bottom guide into the appropriate channel of the bottom track
- Check the door hangs vertically using a spirit level against its face
- Slide the door along the full run to check for smooth operation and consistent clearance
Repeat for each door panel. For a two-door system, the doors should overlap by the amount specified in your installation guide, typically 50-100mm.
Adjusting Sliding Wardrobe Doors After Fitting
Adjusting sliding wardrobe doors is a normal part of installation. Most systems include adjustment mechanisms in the door rollers that allow you to fine-tune door height and vertical alignment after fitting.
The most common adjustments are:
Height adjustment: The door rollers typically have a threaded adjuster that raises or lowers the door relative to the track. Turn clockwise to raise, anti-clockwise to lower. Adjust until the bottom clears the bottom track by the specified gap (usually 1-2mm).
Vertical alignment: If the door leans forward or backward when viewed from the side, adjust the roller eccentricity if your system provides for this.
Door overlap: If doors don't overlap correctly when closed, check that both doors run in the correct channels. The rear door should run in the rear channel of both tracks; the front door in the front channel.
After adjustment, fit the anti-jump clips to the top track. These small plastic or metal clips prevent the door from lifting out if pushed upward. They're a critical safety component and should never be omitted.
The Health and Safety Executive guidance on domestic installations notes that anti-jump and anti-tip devices on large panel doors are considered essential safety features in residential installations.
Weight Capacity, Door Materials, and Long-Term Maintenance
Most people choose sliding wardrobe doors based on appearance. The smarter question is: what are the doors made from, and how much do they weigh?
Door weight and track capacity: Every sliding door track system has a maximum weight capacity per door panel. Exceeding this causes premature wear on rollers and tracks, eventually leading to rough-running doors or doors that come off the track. Lightweight doors in MDF or hollow-core construction are well within the capacity of most standard systems. Heavier doors, particularly those with glass panels or solid timber construction, require heavy-duty tracks and rollers.
Material types and their characteristics:
- MDF with laminate finish: Lightweight, stable, available in many finishes. Good choice for most residential applications.
- Glass panels: Heavier, premium appearance, requires heavy-duty hardware.
- Mirror-fronted: Similar weight to glass, adds the practical benefit of a full-length mirror.
- Woodgrain effect: Usually MDF with woodgrain foil or laminate, combining timber appearance with engineered board stability.
Long-term maintenance: The single biggest cause of sliding door problems after installation is dirty or damaged tracks. Grit and dust accumulate in the bottom track and act as an abrasive against door rollers. Clean the bottom track every few months with a soft brush and damp cloth. Avoid silicone sprays on the track surface, as these attract dust. A light application of dry PTFE lubricant on the rollers keeps the mechanism running smoothly.
Check door rollers annually for wear. Rollers are usually replaceable without removing the door from the track. Catching worn rollers early prevents damage to the track itself.
Fitting sliding wardrobe doors to an uneven floor or a sloped loft ceiling is exactly the kind of challenge that off-the-shelf systems aren't built for. DoorsDirect specialises in made-to-measure sliding wardrobe doors with a three-stage quality check process and a ten-year guarantee, so the doors you receive are built precisely for your opening. Whether you're a homeowner tackling a tricky alcove or a joiner fitting out a new build, get expert measurement guidance and order yours today at DoorsDirect.
Frequently Asked Questions
Is it easy to install sliding wardrobe doors yourself?
Most DIY-confident homeowners can install sliding wardrobe doors in a day. The process involves fitting top and bottom tracks, inserting wall liners and end panels, then hanging the doors and adjusting their height and alignment. Made-to-measure doors simplify the job considerably because they arrive cut to your exact opening width and height, removing the need for on-site cutting. Having a second person to help lift door panels into the top track makes the process safer and faster.
How do I measure for sliding wardrobe doors?
Measure the opening width at three points: top, middle, and bottom. Use the smallest figure. Measure the height on both sides and in the centre, again using the smallest reading. Account for any floor covering thickness and check for plumb using a spirit level or plumb line. For loft conversions or rooms with sloped ceilings, note the exact ceiling angle so your supplier can produce made-to-measure doors that follow the rake. Always double-check measurements before ordering.
How do you adjust sliding wardrobe doors after fitting?
Most sliding wardrobe door systems include adjustable door rollers on the top or bottom of each door panel. Using a pozidrive screwdriver, turn the adjustment screw to raise or lower each roller until the door hangs level and travels smoothly along the track. Check vertical alignment with a spirit level. If a door drags or jumps, inspect the anti-jump clips and confirm the bottom guide is centred in the bottom track. Minor tweaks to roller height usually resolve most alignment issues.
Can sliding doors be added to an existing wardrobe frame?
Sliding doors can often be retrofitted to an existing wardrobe opening, provided the frame is structurally sound and the opening is square. The top and bottom tracks are fixed to the ceiling (or a head rail) and the floor, independent of the carcass. The key check is whether the opening width and height fall within the range your door system supports. Made-to-measure options are ideal here because they accommodate non-standard dimensions that off-the-shelf kits cannot match.
This article was written using GrandRanker
Leave a comment