


How to Measure an Alcove for Sliding Doors
Table of Contents
- What You'll Need to Measure Your Alcove
- How to Measure Width and Height Accurately
- Measuring for Uneven Walls and Out-of-Square Alcoves
- Checking Internal Depth and Storage Configuration
- Sliding Wardrobe Door Track Installation Considerations
- Common Measuring Mistakes to Avoid
- Preparing Your Alcove and Finalising Measurements
- Conclusion
Last Updated: August 19, 2026
What You'll Need to Measure Your Alcove
Getting the right measurements for sliding wardrobe doors starts with having the correct tools. Without proper equipment, even careful work leads to errors that compound during installation. The foundation of accurate measurement rests on a few essential items that every homeowner or tradesperson should have on hand.
A steel tape measure is non-negotiable. Fabric or plastic tape measures stretch and give inconsistent readings, particularly over longer distances. You'll want at least a 5-metre measure, preferably 8 metres, to capture full height and width without repositioning. A spirit level is equally critical for checking vertical alignment and identifying whether your walls are plumb. Most walls aren't perfectly vertical, and sliding wardrobe doors demand precision here, even small deviations cause binding and misalignment.
A plumb line helps verify true vertical when spirit levels alone aren't sufficient, especially in older properties where walls slope or bow. For checking horizontal surfaces, a straight edge (a long, rigid board or metal rule) reveals dips and rises in your floor. Many installers overlook floor irregularities, but these directly affect how smoothly your doors operate. You'll also need a pencil for marking measurements and a notepad or digital record to document everything.
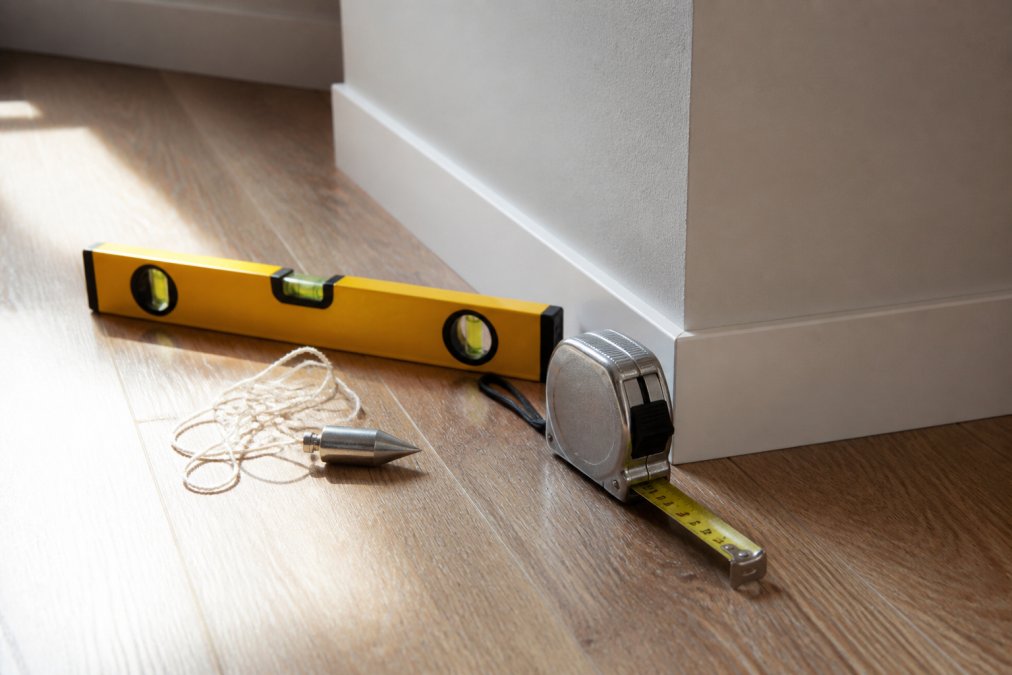
Consider a laser measure if you're working with particularly large or complex alcoves. These tools reduce human error and are especially useful for capturing multiple points quickly. However, they're not essential for most domestic alcove measurements. A simple notebook or smartphone notes app works fine for recording your data, just ensure your records are clear and dated.
At DoorsDirect, we recommend having all these tools before you start. Many customers who attempt measurements without proper equipment end up needing to remeasure, wasting time and creating unnecessary frustration. The small investment in basic tools pays for itself in accuracy and confidence.
How to Measure Width and Height Accurately
Measuring an alcove for sliding doors requires capturing dimensions at multiple points, not just one. Alcoves are rarely perfect rectangles, and walls frequently vary in width and height across their length. This is where precision becomes critical, your sliding wardrobe doors will be made to your exact specifications, so the measurements you provide determine whether they fit perfectly or require adjustment on site.
Measuring width at three points
Start by measuring the width at the top, middle, and bottom of your alcove. Place your tape measure horizontally at the highest point where the doors will sit (typically where the ceiling or coving meets the walls). Record this measurement to the nearest millimetre. Move to the midpoint of the alcove height and measure again. Finally, measure at the lowest point, usually at floor level or just above the skirting board.
Write down all three measurements clearly. In most alcoves, these widths will differ slightly. If the top is 1,200mm, the middle 1,205mm, and the bottom 1,198mm, note all three figures. Your made-to-measure doors need to accommodate these variations. The widest measurement determines the maximum door width, while the narrowest shows where potential clearance issues might arise.
Many people measure only once and assume consistency. This is one of the most common measuring mistakes. Older properties especially show significant variation, walls settle unevenly, plaster builds up inconsistently, and original construction often wasn't perfectly square. Take the time to capture width at three distinct heights.
Measuring height at multiple positions
Height measurement follows the same principle. Measure at the left side of the alcove, the centre, and the right side. Again, record to the nearest millimetre. Sloped ceilings, uneven floors, and wall settlement mean these three measurements will often differ. If your left side is 2,250mm, centre is 2,248mm, and right side is 2,252mm, that 4mm variation matters when you're installing floor-to-ceiling doors.
Pay particular attention to areas where the alcove meets the ceiling. Coving, cornicing, or ceiling details can reduce effective height in specific locations. Measure from the finished floor surface (not the bare floor underneath any carpet or flooring you're installing) to the lowest point of the ceiling or obstruction.
For loft conversions or rooms with sloped ceilings, measure height at the back wall of the alcove as well as the front. Document whether the slope is consistent or varies across the width. This information is essential for custom door fitting, particularly when internal storage configuration needs to work around structural constraints.
Measuring for Uneven Walls and Out-of-Square Alcoves
Not all alcoves are rectangular. Many have walls that aren't perfectly vertical, floors that slope, or corners that don't meet at right angles. These out-of-square conditions are common, especially in older properties, loft conversions, and period homes. Understanding how to measure and account for these irregularities prevents installation problems later.
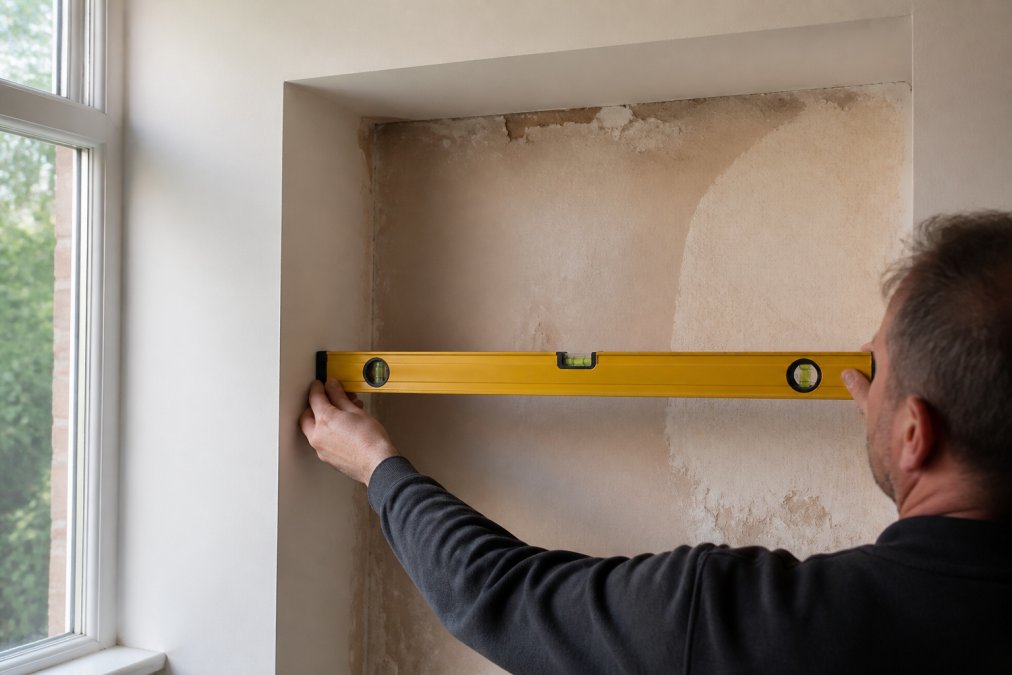
Start by checking whether your alcove walls are plumb. Place a spirit level vertically against each wall, starting at the top and working downward. If the bubble drifts from centre, your wall isn't vertical. Note how far the wall leans and at what height the deviation occurs. Some walls bow outward slightly; others tilt consistently from top to bottom.
Use a plumb line to verify the spirit level findings. Hang the plumb line from the top of the alcove and measure the gap between the line and the wall at several points. This reveals the exact amount of deviation. Record these gaps in millimetres, a wall that's 8mm out of plumb at the top and 15mm at the bottom tells a specific story about how the wall leans.
For out-of-square corners, measure the diagonal distance from top-left to bottom-right, then from top-right to bottom-left. If these diagonal measurements are equal, your alcove is square. If they differ, note the difference. A 5mm variation in a 1,200mm wide alcove is minor; a 20mm variation requires careful planning for door clearance and track alignment.
Scribe marks help document these irregularities. Create a cardboard template of your alcove profile, marking where walls deviate from vertical. This visual record helps installers understand exactly what they're working with. Many professionals use this method because it communicates what measurements alone cannot, the actual shape of the space.
Checking Internal Depth and Storage Configuration
Internal depth determines how much storage your wardrobe actually provides and influences how doors will operate. Measure from the front of the alcove (where the doors will sit) to the back wall. Do this at the top, middle, and bottom, just as you did for width and height. Depth variations affect door clearance when opening and closing.
Standard sliding wardrobe doors need a minimum internal depth to function properly. Doors require space to slide into the alcove without obstruction. If your alcove is very shallow, the doors may not have enough room to retract fully, leaving a permanent gap. Conversely, deeper alcoves allow for more generous internal storage configuration, including hanging rails, shelving, and drawer placement.
Consider what you plan to store. A wardrobe for hanging clothes needs different depth than one combining hanging space with drawers and shelves. Measure your alcove depth, then think about your storage needs. DoorsDirect can help you configure the interior to match both your space dimensions and your storage requirements, this is where made-to-measure solutions excel, allowing customization around your specific depth constraints.
Check for obstructions that reduce usable depth. Radiators, pipes, electrical outlets, or structural elements like chimney breasts take up space. Measure around these obstacles carefully. Your sliding wardrobe door track installation needs to avoid these, and internal fittings must work around them. Document their exact location and size.
Sliding Wardrobe Door Track Installation Considerations
The track system that supports your sliding doors must sit perfectly level and straight. Before finalising measurements, check your floor for levelness. Use a spirit level placed horizontally across the alcove floor. If the floor slopes, note the direction and degree of slope. A floor that's 10mm lower on one side than the other affects how the bottom track sits and how smoothly doors operate.
The top track channel must be perfectly horizontal. Measure the height from floor to where the top track will sit at multiple points across the alcove width. If these measurements vary, your floor is sloped and your track installation must compensate. Some installers use shim packs to level the track; others adjust door hang points. Either way, accurate floor measurement is essential.
Consider the door overlap, the amount doors overlap when closed. This affects the gap between doors and determines the effective opening width. Sliding wardrobe doors typically overlap by 50-100mm depending on design. Factor this into your opening width calculation. A 1,200mm alcove opening doesn't mean 1,200mm of usable width; you lose overlap space.
Check whether your alcove has a casing (the frame around the opening) or whether walls meet directly. Casings affect where track sits and how doors align. Measure the casing depth if present. Some casings are substantial and require track positioning adjustments. Document this in your notes.
Common Measuring Mistakes to Avoid
The most frequent error is measuring only once and assuming consistency. Alcoves vary, and single measurements miss this reality. Always measure at three points for both width and height.
Another common mistake is measuring to the wrong reference points. Measure to finished surfaces where doors will actually sit, not to bare walls or structural elements behind. If you have skirting boards, measure above them. If you have coving, measure below it. The finished surface is what matters for door installation.
Failing to check for plumb and level causes problems during installation. Doors that bind or stick often result from walls that weren't vertical or floors that weren't level. Spend time with your spirit level and plumb line, this investment prevents frustration later.
Many people overlook internal obstructions. Radiators, pipes, and electrical outlets seem obvious, but measuring around them precisely is easy to skip. Mark their location and size clearly. These affect both track placement and internal storage configuration.
Recording measurements incorrectly leads to disaster. Use clear notation: "Width: top 1,200mm, middle 1,205mm, bottom 1,198mm." Ambiguous notes like "about 1,200mm" or "roughly 2,250mm" leave room for error. Precision in recording matches the precision you need in measurements.
Not documenting wall condition is another oversight. A note like "left wall leans out 12mm at top, 18mm at bottom" communicates what a single width measurement cannot. This information helps installers understand how to fit doors successfully in a less-than-perfect space.
Preparing Your Alcove and Finalising Measurements
Once you've captured all measurements, review them for consistency and accuracy. Look for any measurements that seem out of place, a width reading that's significantly different from others might indicate a measurement error. Remeasure anything questionable.
Create a clear summary document showing:
- Width at top, middle, and bottom
- Height at left, centre, and right
- Floor level and slope
- Wall plumb deviations
- Internal obstructions and their locations
- Ceiling height variations
- Any special features (coving, casings, sloped surfaces)
Photograph your alcove from multiple angles. Take shots showing the full alcove, close-ups of corners, and details of any irregularities. These photos help installers and support teams understand your space. They're particularly valuable if you're ordering made-to-measure doors from a distance.
Before ordering, double-check measurements one final time. Measure again if you have any doubt. The cost of remeasuring is negligible compared to the cost of doors that don't fit properly. DoorsDirect offers expert guidance throughout this process, our team can review your measurements and help identify any concerns before you order.
Prepare your alcove surface if needed. Remove any obstacles that will interfere with track installation. Ensure walls are clean and free of loose plaster or paint. If your floor has significant irregularities, these may need addressing before installation. With accurate measurements, clear documentation, and a prepared space, you're ready to order your made-to-measure sliding wardrobe doors. The precision you invest now translates directly into a perfect fit and years of reliable operation.
Getting your alcove measurements right is the foundation of a successful sliding wardrobe door installation. Inaccurate measurements lead to doors that don't fit, binding issues, and costly replacements. DoorsDirect specialises in made-to-measure solutions that work with your exact dimensions, including awkward alcoves, sloped ceilings, and out-of-square spaces. Our three-stage quality check process and ten-year guarantee mean you're investing in doors built to last. With your precise measurements and DoorsDirect's expert fitting guidance, you'll have a wardrobe that functions flawlessly for years to come. Order your made-to-measure sliding doors today and transform your bedroom storage with confidence.
Frequently Asked Questions
How do I measure an alcove for sliding wardrobe doors if the walls are uneven?
Use a spirit level to identify where walls deviate from vertical, then measure the widest and narrowest points. Record all variations in millimetres. For significant unevenness, a plumb line helps establish true vertical. Made-to-measure doors can accommodate these irregularities, DoorsDirect's Strike Plate Premium (£26.00) is specifically designed to overcome wall irregularities when doors close against a wall. Always measure at the top, middle, and bottom of your alcove to capture the full picture.
What tools do I need to measure an alcove accurately for sliding doors?
A steel tape measure (at least 5 metres), a spirit level (600mm minimum), a plumb line, and a pencil are essential. The tape measure must be rigid enough to span the full width without sagging. A spirit level checks for vertical and horizontal alignment, while a plumb line confirms true vertical when walls slope. These tools together ensure the accuracy needed for made-to-measure doors that fit perfectly without gaps or misalignment.
Should I measure the width at the top, middle, and bottom of an alcove?
Yes, absolutely. Measure width at the top, middle, and bottom because alcoves are rarely perfectly rectangular. Record all three measurements in millimetres. If the widths vary by more than 10mm, note the exact variation, this tells your supplier whether the space is out-of-square. Many installation failures occur because only one width measurement was taken, missing critical irregularities that affect track alignment and door clearance.
What is the minimum depth required inside an alcove for sliding wardrobe doors?
Most sliding wardrobe doors require a minimum internal depth of 500mm to accommodate the door panel and track system. However, this depends on your specific door design and internal storage configuration. Measure from the back wall to the front edge of any existing skirting board or coving. If your alcove is shallower, DoorsDirect can advise on bespoke solutions. Always account for electrical outlets, pipes, or other obstructions that reduce usable depth.
This article was written using GrandRanker
Leave a comment