


Customising Interior Storage for Sliding Wardrobes
Table of Contents
- Why Customising Interior Storage for Sliding Wardrobes Pays Off
- What You'll Need Before You Start
- Sliding Wardrobe Internal Layout Ideas That Maximise Space
- How to Organise a Sliding Wardrobe for Everyday Use
- Bespoke Wardrobe Storage Accessories Worth Adding
- DIY Interior Hacks on a Budget
- Material Durability and Maintenance for Interior Fittings
- Accessibility-Focused Design for Every User
- Frequently Asked Questions
Last Updated: October 3, 2026
Why Customising Interior Storage for Sliding Wardrobes Pays Off
A sliding wardrobe storage setup is only as good as what sits behind the doors.
At DoorsDirect, we build made-to-measure interiors alongside our sliding doors, so we see which layouts work.

A standard rail-and-shelf setup suits a few long coats and little else.
Below, we break down the layouts, heights and fittings that make a sliding wardrobe genuinely useful, plus the budget tricks and long-term care that keep it that way.
What You'll Need Before You Start
Measure your opening first, then measure it again. Every interior decision follows from the width, height and depth you are working with.
Gather these before you order anything:
- A tape measure and a notepad
- A full inventory of what you store (count long garments, folded items, shoes, bags)
- The internal width, height and depth of your wardrobe space
Next, sort your clothes into three groups: hanging long, hanging short, and folded. That split decides how much rail you need versus shelving.
For trade joiners, a supplier's measuring support saves real time. We offer guidance from measurement through to final fit.
Sliding Wardrobe Internal Layout Ideas That Maximise Space
The best internal layout splits the wardrobe into vertical zones rather than one open box.
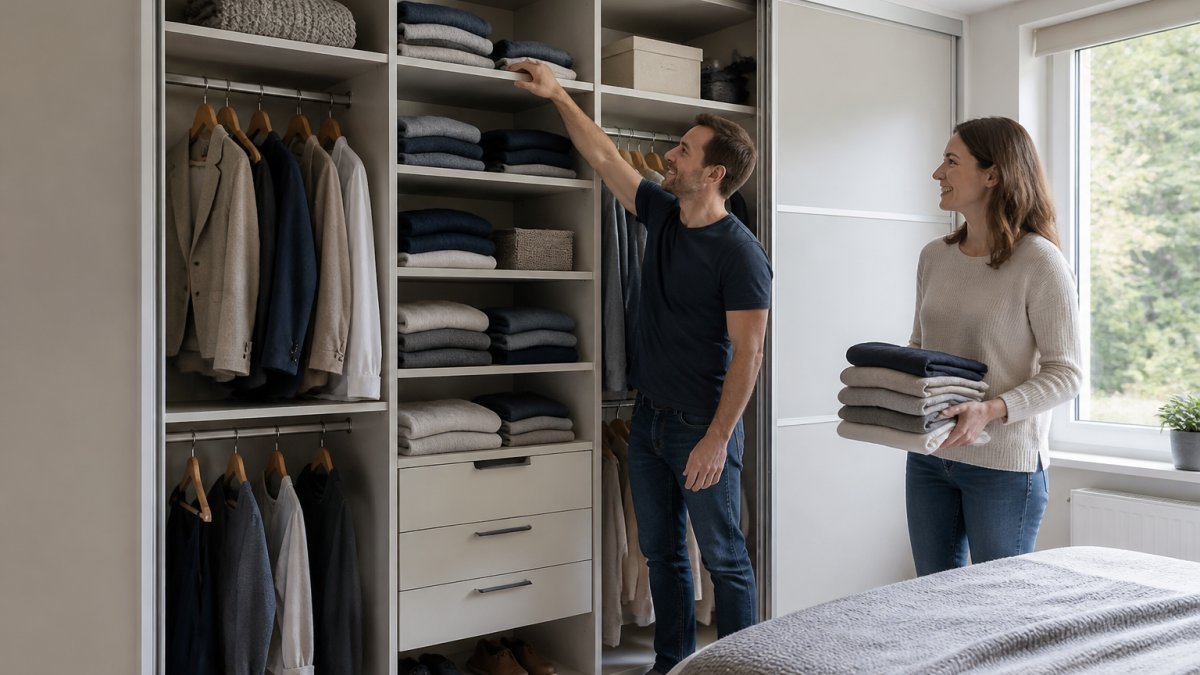
Start with the full height you have. A wardrobe at 2.3 metres tall can carry a top shelf for seasonal items, a main hanging zone, and drawers or shoe racks near the floor.
Full-Height Hanging for Long Garments
Full-height hanging suits coats, dresses and long jackets. Allow roughly 1.5 metres of clear drop for a long garment, and keep this zone at one end so it does not break up the rest of the layout.
A common mistake is running full-height rail across the whole wardrobe, leaving a metre of dead air under every shirt. Reserve full-height for one column only, usually the end nearest the door opening.
Double-Hang and Shelf Combinations
Double-hang turns one tall space into two shorter rails. Shirts, blouses and trousers fit on the upper rail, with a second rail below for jeans or skirts.
Pair this with adjustable shelving beside it. Folded knitwear, bags and boxes stack neatly, and standard 32mm system holes let you shift a shelf one notch at a time, enough for a taller boot box or a stack of jumpers without re-drilling.
Choosing Between Columns, Bays and Mixed Layouts
There are three practical ways to divide a sliding wardrobe:
- Full-width zones, one long rail across the top, one shelf below, drawers at the base. Best when most of your clothing hangs and you own few long garments.
- Vertical columns, each bay is dedicated to one category (long hanging, double-hang, shelving). Best for shared wardrobes where two people have different needs.
- Mixed layout, a long-hang column at one end, double-hang in the middle, and a shelving-and-drawer stack at the other. This is the configuration most fitters default to because it covers the widest range of clothing types without wasting a single bay.
A useful rule of thumb: count your long garments first. If you own fewer than ten, a single 600mm-wide long-hang column is usually enough, and the rest can go to double-hang and shelves. If you own more, widen the column or add a second at the opposite end.
Planning for Depth, Not Just Width
Width and height get all the attention, but depth decides what actually fits. A 600mm-deep wardrobe handles a standard coat hanger with a few centimetres to spare.
Shoes need roughly 200mm of depth per pair on a flat shelf, or 300mm on an angled rack. Bags and folded knitwear sit on almost any shelf depth, which is why they make good filler for awkward corners beside a door track.
How to Organise a Sliding Wardrobe for Everyday Use
Organise by frequency, not category. Items you wear weekly belong at eye level and within easy reach, while occasional pieces go high or low.
Here is how we would set out a typical shared wardrobe:
- Clear everything out and sort into keep, store and donate piles.
- Assign the prime eye-level zone to daily-wear items.
- Put long hanging at one end, double-hang in the middle.
- Add drawers at waist height for folded basics and underwear.
- Use the top shelf for suitcases and seasonal clothing.
- Keep the floor zone for shoes on racks or pull-out trays.
- Label shelf edges if two people share the space.
The goal is a layout where nothing needs moving to reach something else.
Ergonomic Height Planning for Rails and Shelves
Ergonomic planning means placing what you use most between hip and shoulder height, the easiest zone to reach without bending or stretching.
A few working guidelines:
- Main hanging rail: around shoulder height for the tallest regular user
- Second rail below: roughly a forearm's length lower
- Shelf for daily items: at chest height
If two people of very different heights share the wardrobe, give each their own vertical section rather than compromising on one rail height.

Bespoke Wardrobe Storage Accessories Worth Adding
The right accessories turn awkward gaps into usable storage, the difference between a wardrobe that holds your clothes and one that holds them well.
Worth the spend:
- Drawer units for folded items and small accessories
- Pull-out trays for jewellery, watches and ties
- Shoe racks to keep footwear off the floor
For a flexible setup, our Spacepro Relax hanging rail brackets let you add rails at different heights, while the matching shelf brackets support both glass and solid shelves.
A ready-made option is our Interior 2 Door A set, which fits an opening up to 2100mm wide and includes end panels, a divider, a floor and ceiling panel, a shelf and three hanging rails.

What Each Accessory Actually Does to Capacity
Accessories are not decoration, they change how much you can store in the same footprint:
- A drawer unit replaces roughly two shelves of folded storage in the same width, because it lets you stack vertically without the pile collapsing. A 600mm-wide, four-drawer unit typically holds as many folded items as three fixed shelves at the same width.
- A pull-out tray adds usable depth to a shallow wardrobe. Where a fixed shelf forces you to reach past the front row, a tray slides the whole contents into view, so you can use the full 500-560mm of internal depth instead of the front 300mm.
- A shoe rack doubles shoe capacity compared with a flat shelf, because angled or tiered racks use the vertical gap between shelf and rail rather than the shelf surface alone.
Wire, Board or Metal: Choosing the Right System
Most interiors are built from one of three material families, each with a different lifespan and feel:
- Wire systems are the lightest and cheapest. They are quick to fit and easy to reconfigure, but they flex under load and are best for shoes, folded items and light hanging. They suit a rental or a short-term refresh.
- Furniture-grade board systems (18mm melamine-faced chipboard, such as Egger) are the standard for made-to-measure interiors. They hold screws and rail brackets firmly, take a PVC edge to seal cut faces, and can be re-drilled if you move a shelf. They are heavier and less forgiving to cut on site.
- Metal column systems sit between the two. Aluminium uprights carry brackets at set intervals, so you can move a rail or shelf without touching the carcass. They cost more up front but are the easiest to reconfigure as your storage needs change.
A mixed approach is common and sensible: board for shelves and drawer boxes, metal columns for the hanging rails, and wire only for shoe racks where weight is low.
Fitting Details That Decide Whether an Accessory Works
Even a good accessory fails if it is fitted badly:
- Drawer runners need a level carcass. A 2mm slope across a 600mm drawer is enough to make it rub.
- Soft-close runners add roughly 10-15mm to the depth behind the drawer box, so check clearance against the back panel before ordering.
- Shelf brackets should be fixed into the side panel, not the back panel, unless the back is a structural board.
DIY Interior Hacks on a Budget
You do not need a full bespoke fit to improve your sliding wardrobe storage. Small, cheap changes often deliver the biggest gain.
Try these first:
- Add a second rail under an existing one to create double-hang
- Use stackable boxes on the top shelf to group seasonal items
- Fit adhesive LED strip lights along the underside of a shelf
Check what your existing system allows before buying anything. Many rails and shelves can be moved or extended with a few brackets rather than a full replacement.
Material Durability and Maintenance for Interior Fittings
Interior fittings last longer when the material suits the job. Furniture grade board, such as Egger, at 18mm thick holds screws and rails far better than thin chipboard.
Look for these signs of quality:
- Board thickness of 18mm or more
- Matching PVC edging to seal cut edges
- Metal rails and brackets rather than plastic
Maintenance is simple. Wipe shelves and panels with a damp cloth, and avoid soaking the edges.
Our own interiors carry a ten-year guarantee, backed by a three-stage quality check before anything leaves us.
Accessibility-Focused Design for Every User
A wardrobe should work for everyone who uses it, including children, older adults and anyone with limited reach or grip.
Plan for accessibility with these steps:
- Keep the most-used items between hip and shoulder height
- Choose pull-out trays and drawers over deep, dark shelves
- Fit soft-close runners so drawers need less force to open
For a child's wardrobe, set the main rail lower and add a second rail as they grow. For anyone with reduced mobility, avoid stacking heavy items high and keep the floor zone clear.
This is where a made-to-measure approach earns its place. A fixed layout forces you to adapt. A custom one adapts to you.
Frequently Asked Questions
What are the best internal storage options for sliding wardrobes?
The most effective options combine adjustable shelving, hanging rails and drawer units. For sliding wardrobe storage, start with a mix of full-height hanging for long garments and double-hang sections for shirts and trousers. Add pull-out trays for accessories and shoe racks at the base. DoorsDirect offers complete interior sets such as the Interior 2 Door A, which includes end panels, a divider, a floor panel, a ceiling panel, a shelf and three hanging rails that can be cut to size.
How do I maximise space in a narrow sliding wardrobe?
Use vertical space by stacking shelves above and below hanging rails. Choose a double-hang configuration rather than single full-height hanging where possible, and add pull-out trays instead of deep fixed shelves. Slimline drawer units and compartmentalisation keep smaller items accessible without wasting depth. If your opening is tight, measure carefully and consider a bespoke interior set cut to your exact dimensions rather than standard off-the-shelf components.
What is the standard depth required for sliding wardrobe internals?
Sliding wardrobe interiors typically need a minimum internal depth of around 600mm to accommodate hanging rails and allow garments to hang without touching the doors. If you plan to store bulky items or use drawer units, 650mm or more gives extra clearance. Always check your specific door track depth, as this affects how much usable space remains inside. DoorsDirect interiors are designed to work in conjunction with their sliding wardrobe doors, so the fit is matched from the start.
Are bespoke wardrobe interiors worth the investment?
Bespoke interiors are worth it when standard sizes leave awkward gaps or waste space. A customised layout means every shelf, rail and drawer fits your exact dimensions and the way you actually store clothes. DoorsDirect interiors use 18mm furniture grade board with 2mm PVC edging for durability, and come with a ten-year guarantee. If you want specific compartments, bespoke gives a far better result than trying to adapt a generic kit.
Getting the inside of a sliding wardrobe right is the difference between storage that works and storage you fight with daily. At DoorsDirect, we build made-to-measure sliding wardrobe doors and bespoke interiors with a ten-year guarantee and a three-stage quality check on every order. Our team guides you from measurement to final fit, with trade pricing and support for joiners and developers. Order yours today and build a wardrobe that fits your space and how you actually live.
Leave a comment