


Sliding Wardrobe Components for DIY Projects: 2026 Guide
Table of Contents
- Quick Comparison: Sliding Wardrobe Components for DIY Projects
- What You'll Need Before You Start
- Choosing Sliding Wardrobe Doors With Soft Close
- How to Install Sliding Wardrobe Tracks
- Interior Fittings: Shelves, Rails and Drawer Boxes
- Wardrobe Door Roller Replacement and Maintenance
- Common DIY Mistakes to Avoid
- Frequently Asked Questions
Last Updated: September 24, 2026
Quick Comparison: Sliding Wardrobe Components for DIY Projects
Getting the right sliding wardrobe components for DIY projects comes down to four decisions: track system, door hardware, interior fittings, and how much weight your opening can carry. This guide from DoorsDirect walks through each one, from the top track down to the anti-jump clips, so you can build a wardrobe that still slides smoothly in ten years.
| Component | What It Does | Typical Cost | Watch For |
|---|---|---|---|
| Top track | Guides doors, carries no weight | Varies by width | Must be dead level |
| Bottom track | Carries all door weight | Varies by width | Keep clear of carpet |
| Rollers and bottom rollers | Let doors glide | Varies by kit | Cheapest part to fail |
| Anti-jump clips | Stop doors lifting off | Low cost | Often skipped by DIYers |
| Soft-close dampers | Cushion the final travel | Varies by kit | Needs correct door weight |
| Interior fittings | Shelves, rails, drawers | From £8 | Must suit carcass depth |
What You'll Need Before You Start
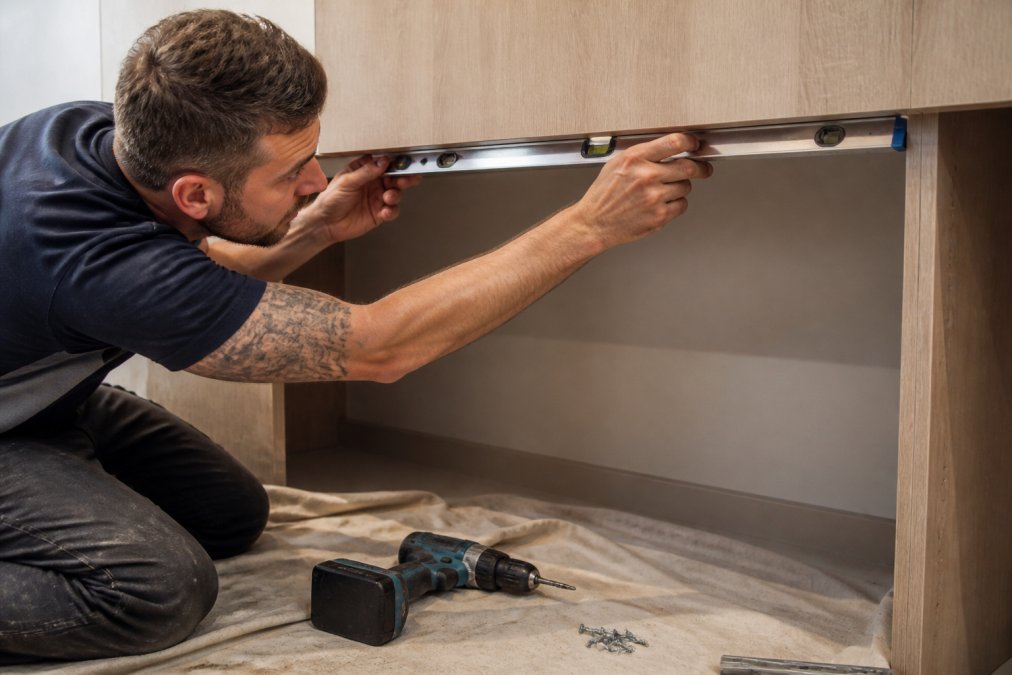
Measure the opening in three places: top, middle and bottom. Use the smallest figure. A spirit level and plumb line will confirm whether your walls are true, and most aren't.

Tools and Fasteners Checklist
- Tape measure and pencil
- Spirit level (600mm minimum)
- Plumb line or laser level
- Cordless drill and driver bits
- Masonry bits for wall plugs
- Screws, wall plugs and fasteners
- Hacksaw for trimming track
- Dust sheet and vacuum
Choosing Sliding Wardrobe Doors With Soft Close
Soft-close dampers are the single upgrade most worth paying for. They catch the door in the last few centimetres and pull it shut quietly, which stops the slam that loosens fixings over time.
How to Install Sliding Wardrobe Tracks
Installing sliding wardrobe tracks is a two-stage job: fix the top track dead level, then set the bottom track parallel to it. Get the top track wrong and no amount of roller adjustment will save the doors.
- Single top track, bottom-rolling: the door hangs from top rollers and runs on bottom rollers. Most common in domestic kits. The bottom track carries the door's weight; the top track only guides and stops the door tipping.
- Top-hung (bottomless): the door hangs entirely from the top track, with a floor guide at the base instead of a bottom track. Cleaner floor line, but the top track and its fixings take the full load, so it must be fixed into structure.
- Twin or triple track: two or three parallel channels in one extrusion, letting doors pass each other. Wider extrusion, so check your opening depth before ordering.
Total time: 2-3 hours for a standard two-door opening.
Fitting the Top Track and Bottom Track
- Mark the top track position using your spirit level, checking level in both directions. [Time: 20 minutes]
- Drill and fix the top track into studs or masonry. Use every fixing hole. [Time: 30 minutes]
- Drop a plumb line from each end of the top track to the floor. [Time: 10 minutes]
- Position the bottom track on those marks and fix it down. [Time: 30 minutes]
- Check the gap between tracks is identical at both ends. [Time: 5 minutes]
Expected result: Two parallel tracks with an equal gap end to end.
Track Profiles and Roller Ratings
Track and roller ratings are the numbers that decide whether your doors still glide in five years. A few rules of thumb that hold across most domestic systems:
- Standard single rollers are typically rated around 25-40 kg per door. Two rollers per door, so a 60 kg door needs a heavier roller set, not just more of the same.
- Heavy-duty rollers (often nylon-tyred with a metal bearing) are rated from roughly 60 kg upward per door and are the correct choice for glass or solid-core timber doors.
- Top tracks are usually extruded aluminium. Cheaper tracks are thinner-walled and flex under load; a track that flexes will not stay level, and the doors will bind in the middle of the opening.
- Anti-jump clips are small nylon or metal blocks that sit in the top channel above each roller. They stop the door lifting out if it is knocked or if a roller fails. They are the cheapest component in the system and the one most often left in the box.
Aligning Doors and Fitting Anti-Jump Clips
Hang the doors, then adjust the bottom rollers until the doors sit level and meet evenly in the middle. Most bottom rollers have a cam or screw adjuster; a quarter turn moves the door a few millimetres, so adjust in small steps and re-check the gap at the top.
Interior Fittings: Shelves, Rails and Drawer Boxes
Interior fittings should be planned before the doors go on, because adding them later means working around hung doors. Start with what you actually store: long hanging for coats, double hanging for shirts, shelves for folded items, drawers for everything else.
How Interior Components Fit Together
Our made-to-measure systems are built around vertical aluminium columns. Everything else, rails, shelf brackets, drawer boxes, clips or screws into those columns at set increments. That is what makes the system adjustable, and it is why column spacing matters more than the fittings themselves.
- Carcass depth: standard wardrobe depth is 600 mm. Shelves are typically 500 mm deep to leave clearance for doors and hanging items. If your opening is shallower, you need shallower shelves, not standard ones cut down.
- Column spacing: rails and shelves span between columns. Wider spans need thicker shelf material or a mid-support, or the shelf will bow under load.
- Shelf material: 18 mm melamine-faced chipboard with 2 mm PVC edging is the domestic standard. Glass shelves look sharper but need different brackets and are heavier, which matters if the shelf spans a wide gap.
- Rail brackets: adjustable brackets let you move rail heights without re-drilling. Fixed brackets are cheaper but lock you into one layout.
- Drawer boxes: metal-sided boxes with soft-close runners are the durable option. They need a top and bottom panel ordered separately, or they can sit between shelves. Screw them to the back wall as well as the column brackets.
Budget-Tier vs Premium-Tier Components
Our made-to-measure system reflects real differences in how the components are made:
- Track extrusion: budget tracks are thin-walled aluminium that flexes under load; premium tracks are thicker-walled with a smoother internal profile, which reduces roller wear.
- Rollers: budget rollers use plain nylon wheels on a steel pin; premium rollers use sealed bearings and tyred wheels, which run quieter and last longer.
- Soft-close dampers: budget dampers are single-stage and only work within a narrow door-weight band; premium dampers are adjustable and tolerate a wider range.
- Fixings: budget kits ship with generic screws and plugs; premium systems supply fixings rated for the load the track will carry.
Component Reference
- Shelf brackets: £16.80 per pair, designed for aluminium columns and suitable for glass or solid shelves
- Hanging rail brackets: £8.00 per pair, for adjustable rail heights
- Shelves: from £48.00, 18mm melamine-faced chipboard with 2mm PVC edging, 500mm deep
- Drawer boxes: from £340.00, fully assembled with metal-sided soft-close runners
- Shoe rack: £40.00, cut to size to fit between columns
- End panel: £78.00, 2750mm x 640mm x 18mm, for finishing an open end
DoorsDirect supplies made-to-measure interior components that cut to the millimetre, which matters in alcoves and awkward corners where standard units leave gaps.

Wardrobe Door Roller Replacement and Maintenance
Wardrobe door roller replacement is the most common repair on any sliding system, and it's usually a ten-minute job. Rollers wear, flatten and start rumbling long before they fail completely.
Signs you need new rollers:
- Doors drag or need a push to start moving
- A grinding or rumbling noise on the bottom track
- Doors sit lower than they used to
- Visible flat spots on the roller wheel
Weight Capacity and Structural Support
Every sliding system has a weight limit, and it's set by the rollers and the top track fixings, not the doors. Heavier doors need larger rollers and more fixing points.
Check three things before hanging heavy doors:
- What load the roller kit is rated for
- Whether the top track is fixed into structure or just plasterboard
- Whether the floor track sits on a solid, level surface
Common DIY Mistakes to Avoid
The biggest mistake is measuring once. Measure the opening at the top, middle and bottom, and take the smallest number, because openings are rarely square.
Frequently Asked Questions
What components are needed to build a sliding wardrobe?
A working sliding wardrobe needs a track system (top track, bottom track or floor track), bottom rollers, a top guide, anti-jump clips, and door panels in your chosen finish. For the interior you'll want aluminium columns, shelf brackets, hanging rail brackets, and shelves or drawer boxes. End panels finish the sides where doors don't meet a wall, and end brushes or dust seals keep the track clear. Buy these as a matched kit so panel thickness and roller height line up.
Are soft-close mechanisms compatible with all sliding wardrobe kits?
No. Soft-close dampers are designed around a specific track profile and roller carriage, so a damper made for one system won't fit another. Check the kit's stated compatibility before buying, and match the damper to the door weight it's rated for. If you're upgrading an older wardrobe, measure the track width and roller height first. Sliding wardrobe doors with soft close work best when the damper, track and rollers all come from the same range.
How do I make a DIY sliding door track?
You don't make the track itself, you fit a manufactured one. Aluminium top tracks and bottom tracks are cut to your opening width, then fixed to the wall or carcass with screws and wall plugs. The top track carries the top guide and anti-jump clips; the bottom track or floor track carries the bottom rollers. Cut aluminium with a fine-tooth blade, deburr the ends, and check the track is level with a spirit level before fixing it permanently.
What is the difference between top-hung and bottom-rolling wardrobe systems?
Bottom-rolling systems carry the door weight on rollers running in a floor track, with a top guide keeping the door upright. Top-hung systems hang the door from rollers in the top track, leaving the floor clear. Bottom-rolling is simpler to install and easier to repair because you can lift a door out and swap a roller. Top-hung suits rooms where a floor track would be a trip hazard or where the floor isn't level.
How often should wardrobe door rollers be replaced?
Replace rollers when a door starts to drag, jump the track, or run noisily, which usually points to worn wheels or a flattened carriage. On a well-fitted system with quality rollers, expect several years of smooth running before replacement is needed. Clean the track and check the anti-jump clips at the same time. Wardrobe door roller replacement is a straightforward job: lift the door out, unclip the old carriage, and fit a matching replacement.
Sliding wardrobe components are only as good as their weakest part, and that part is almost always the hardware you can't see. DoorsDirect supplies made-to-measure sliding wardrobe doors and interior components with a three-stage quality check and a ten-year guarantee, plus trade support and guidance from measurement through to final fit. Order yours today and build a wardrobe that still glides in a decade.
Leave a comment