


Loft Wardrobe Layouts: Bespoke Interior Design Guide
Table of Contents
- Loft Wardrobe Layouts: Planning the Space Before You Buy
- The Three Loft Zones: Full Height, Transition, Low Eaves
- Working With Sloped Ceilings and Eaves Storage
- Internal Configuration: Hanging Rails, Drawers and Modules
- How to Organise a Wardrobe Interior by Zone
- Maximising Bedroom Storage Space in a Loft Conversion
- Bespoke Wardrobe Interior Ideas: Doors, Finishes and Lighting
- Ventilation, Load-Bearing and Smart Integration
- Conclusion
- Frequently Asked Questions
Last Updated: September 29, 2026
Loft Wardrobe Layouts: Planning the Space Before You Buy
Designing interior wardrobe layouts for lofts starts with one honest question: what can you actually stand up in? A loft conversion is rarely a simple rectangle, you get a tall central strip, a shrinking transition zone, and low eaves that swallow standard furniture whole. The layouts that work are planned around the roofline.
The Three Loft Zones: Full Height, Transition, Low Eaves
Every loft splits into three zones, and each one takes a different kind of storage.
- Full height: the central strip where you can stand upright. Best for full-depth hanging.
- Transition: where the ceiling starts to drop. Suits shorter rails and drawers.
- Low eaves: the shallow edge. Ideal for long-term storage and pull-out units.
Working With Sloped Ceilings and Eaves Storage
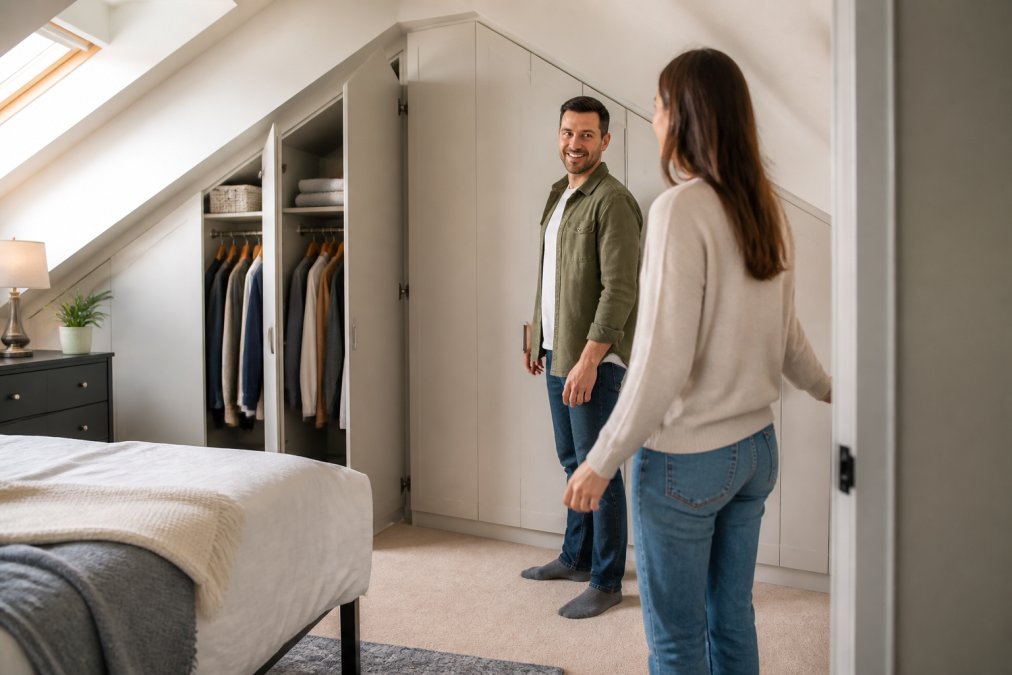
Sloped ceilings are not a problem to solve but a shape to follow. Bespoke joinery cut to the roof pitch turns awkward angles into useful volume, while standard cabinets leave triangular gaps you can never reach.
Knee Walls, Roof Pitch and Angled Panels
The knee wall is the short vertical wall under the slope, and its height sets your limit. A steep roof pitch gives more usable height close to the wall; a shallow one keeps storage low.
Internal Configuration: Hanging Rails, Drawers and Modules
The inside of a loft wardrobe matters more than the doors. A sensible internal configuration pairs hanging space with modular storage, so the layout adapts as your needs change.
A simple starting point:
- Full-height zone: double hanging rail for shirts and dresses
- Transition zone: single rail plus a shelf above
- Low eaves: pull-out drawers and box storage
- Deep corners: angled or corner modules to reclaim wasted space
How to Organise a Wardrobe Interior by Zone
Knowing how to organise a wardrobe interior comes down to matching the item to the height you have: tall items go where you can stand, rarely used items go low.
- Full height: long hanging for coats and dresses
- Eye level: short hanging and folded stacks you use daily
- Below eye level: drawers for folded clothes and accessories
- Low eaves: seasonal items, suitcases and spare bedding
| Zone | Usable Height | Best Storage Type | Access Frequency |
|---|---|---|---|
| Full height | Stand upright | Long and double hanging | Daily |
| Transition | Reduced headroom | Short hanging, shelves | Daily to weekly |
| Low eaves | Shallow, low | Pull-out drawers, boxes | Seasonal |
Maximising Bedroom Storage Space in a Loft Conversion
Maximising bedroom storage space in a loft is mostly about going up and going deep. Floor space is fixed; vertical space is not.
Three moves that add real capacity:
- Run storage floor-to-ceiling in the full-height zone
- Use the eaves for depth, not just width
- Close the end of the run with a finished panel so the unit reads as built-in
Bespoke Wardrobe Interior Ideas: Doors, Finishes and Lighting
Bespoke wardrobe interior ideas work best when the finish supports the shape rather than fighting it. In a loft, lighter tones and reflective surfaces help a low-ceilinged room feel open, but the decisions that change performance are the door mechanism, the lighting circuit and the finish durability, not the colour swatch.

Choosing the Door Mechanism
Door type is a spatial decision first and an aesthetic one second.
- Sliding doors: run on top-hung or bottom-rolling tracks and need no swing clearance, so they suit a run placed close to a bed or where the eaves pinch the floor. Top-hung systems keep the floor track-free. The trade-off is that only one half of the interior is accessible at a time, so plan the internal zones to sit behind the panel you open most.
- Hinged doors: give full access to the whole interior at once and are simpler to align on a straight run, but each leaf needs roughly its own width in clear floor space to open. On a narrow loft landing or beside a low knee wall, that swing often rules them out.
- Bi-fold doors: fold back in a concertina and need less clearance than hinged leaves, which works where a sliding track is impractical. The hardware is more complex, so alignment and runner quality matter more over time.
Finishes That Earn Their Place
- Mirror and glass: bounce light into deep, dark corners and make a low room read taller. On a sliding run, a full mirror panel also removes the need for a separate dressing mirror.
- Matt and satin lacquer: forgiving of fingerprints and easy to wipe, which suits a room used daily.
- Woodgrain and veneer: warmer and better suited to period conversions, but lighter grains keep a low-ceilinged space from closing in.
- Handleless profiles: a recessed finger-pull or push-to-open catch removes protruding handles that catch on low eaves and sloped panels.
Match the finish to the door mechanism, not the other way round. A heavy mirror panel needs a track rated for the weight; a lightweight veneer leaf does not.
Lighting the Interior
Deep wardrobes go dark fast, and in a loft the usable depth is often greater than the light reaching it. Plan the lighting alongside the interior layout:
- LED strip lighting along the underside of each shelf and the back of the hanging run lights the contents rather than the room.
- Sensor activation, a door switch or a passive infrared sensor, means the light comes on when the door opens and off when it closes, so it is not left running.
- Warm white (around 2700-3000K) reads better against clothing than cool white, which flatters nothing.
- Mains-fed versus low-voltage: a mains circuit needs a qualified electrician and should be planned before the interior goes in; low-voltage LED tape on a driver is simpler to add but still needs a power source routed to the unit.
Ventilation, Load-Bearing and Smart Integration
Most loft wardrobe guides stop at the pretty part. The two things that decide whether a run is safe and durable, airflow and weight, are the ones commercial pages tend to skip.
Ventilation and Moisture Control
A loft sits directly under the roof, so it traps heat in summer and holds moisture in winter. Warm, moist air rises and meets a cold roof slope, and where that air cannot move, condensation forms. A fully sealed wardrobe pushed tight against a cold roof structure gives that moisture nowhere to go, and the result is damp and mould behind the unit, which you only discover when you move it.
Design moves that reduce the risk:
- Leave a ventilation gap between the back of the unit and the roof structure so air can circulate behind it. A continuous gap is better than a sealed back panel pressed to the slope.
- Keep eaves ventilation paths clear. Lofts are usually ventilated at the eaves, and blocking that path with a solid run of cabinetry can trap moisture in the roof void. Where a wardrobe crosses an eaves vent, keep the airflow route open.
- Avoid sealing a cold surface. A back panel that sits directly against a cold roof slope becomes a condensing surface. A small stand-off and an air gap break that contact.
- Ventilate the room itself. Trickle vents, extract or a window that opens let the whole space breathe, not just the wardrobe.
- Choose moisture-tolerant materials for any panel that sits against a cold surface, and avoid sealing in a space you cannot inspect.
Load-Bearing Considerations
A loaded wardrobe is heavy. Clothes, bedding, books and boxed storage add up quickly, and a floor-to-ceiling run concentrates that weight along the line of the unit. In a loft, the floor structure is not always the same as on a lower storey, and the joists may run in a direction that puts the load where you least expect it.
Practical points:
- Spread the load. A run with a continuous base spreads weight better than one standing on a few adjustable feet.
- Fix tall units to the wall structure, not just to each other, so the run cannot tip.
- Be cautious with heavy storage in the eaves. Boxes of books or tools in a low eaves run put load on the outer edge of the floor, which is often the least stiff part of a loft floor.
- Ask before you assume. If you are planning a floor-to-ceiling run, or storing anything genuinely heavy, have the floor structure checked by a structural engineer. It is far cheaper to check first than to remedy later.
Smart Integration
Smart features are easiest to add at the planning stage, because retrofitting them means dismantling the interior.
- Sensor LED lighting, door switches or motion sensors, is the single most useful addition in a deep loft wardrobe.
- Soft-close runners and hinges reduce noise and wear on doors that are opened and closed daily.
- App-controlled or dimmable lighting lets you set a low level for night use without a bright overhead.
- Pull-out rails and lift mechanisms make the full depth of a deep run reachable without crawling in.
Conclusion
Loft wardrobe layouts live or die on the planning stage, not the finish. Zone the space by height, match the storage to each zone, and the awkward angles stop being a problem.
Frequently Asked Questions
What are good layouts for a wardrobe interior in a loft?
Divide the loft into three zones: full-height areas for double hanging rails, mid-height transition zones for single rails or shelves, and low eaves for pull-out drawers or lidded boxes. Run the tallest storage where you stand, and keep the shallowest modules where you crouch. This keeps daily-use items at eye level and stores occasional items in the awkward corners.
How can I make the most of limited vertical space in a loft?
Vertical space shrinks as the roof pitch drops. Use floor-to-ceiling shelving on the tall side, stack drawers in the low sections, and add a second rail above the first where headroom allows. Pull-out drawers are more practical than deep shelves in low areas because you can see everything without bending far.
What are common wardrobe design mistakes in loft conversions?
The most common mistakes are ordering standard-width carcasses, ignoring the knee wall height, and blocking ventilation gaps behind the wardrobe. Another frequent error is choosing hinged doors where a sloped ceiling leaves no swing room; sliding doors avoid this. Skipping a scale plan usually leads to wasted eaves storage and doors that clash with the ceiling.
Can I really customise the interior around an awkward alcove with a sloped wall?
Yes. Bespoke interiors are built from modular components such as shelf stacks, hanging rails and brackets that can be cut or positioned to suit the space. An end panel can close off the side where doors do not reach a wall, and rails can be trimmed to the required width. Send your dimensions and we can confirm what will fit before you order.
Leave a comment