


Sliding Wardrobe Fitting Service: A Homeowner's Guide
Table of Contents
- Why Choose a Professional Sliding Wardrobe Fitting Service?
- Cost of Fitted Sliding Wardrobes: What to Expect
- How to Measure for Sliding Wardrobe Doors
- The Sliding Wardrobe Installation Process Explained
- DIY vs Professional Installation: A Cost-Benefit Analysis
- Choosing Your Made-to-Measure Doors and Interiors
- Conclusion: Book Your Sliding Wardrobe Fitting Service
- Frequently Asked Questions
Last Updated: September 7, 2026
Why Choose a Professional Sliding Wardrobe Fitting Service?
A professional sliding wardrobe fitting service transforms a bedroom into a simplified, clutter-free space. This guide from DoorsDirect walks you through costs, measuring, installation, and the critical decisions that determine project success.
Sliding doors eliminate the swing arc of hinged doors, so wardrobes can sit flush against furniture or in tight alcoves. For awkward layouts like loft conversions with sloped ceilings, made-to-measure sliding wardrobe doors are often the only practical solution. A professional fitting service ensures the track system is perfectly aligned and the soft-close technology functions flawlessly.
Cost of Fitted Sliding Wardrobes: What to Expect
The cost of fitted sliding wardrobes depends on the number of doors, the width of your opening, and whether you choose matching interior storage. A two-door configuration suits openings up to around 2100mm wide, while runs of 3100mm or more need three or four doors to keep each panel manageable (gov.uk).

| Configuration | Approx. Opening Width | Doors & Track | Interior Set |
|---|---|---|---|
| 2 doors | Up to 2100mm | £538.00 | £478.00 |
| 3 doors | Up to 3130mm | £1,317.00 | £754.80 |
| 4 doors | Up to 4160mm | £1,016.00 | £885.00 |
| 5 doors | Up to 4860mm | £2,328.00 | £1,090.20 |
Door prices include the top and bottom track sets; interiors are sold separately. A common mistake is budgeting only for the doors, then discovering the interior carcass, end panels, and edging strips add a significant sum. End panels, needed where the wardrobe doesn't butt against a wall, cost around £78.00 each. Soft brush edging strips on the door sides can prevent pinched fingers and reduce draughts.
How to Measure for Sliding Wardrobe Doors
Measuring correctly is the single most important step. A mistake of a few millimetres means doors that don't fit, and because made-to-measure products are cut to your specification, they typically can't be returned.
Tools You Will Need
Gather a steel tape measure (not a fabric one, which stretches), a spirit level, a pencil, and paper, plus a step ladder if measuring floor to ceiling. Check that your tape measure reads in millimetres, the standard unit for wardrobe dimensions.
Step-by-Step Measuring Guide
Measure the width of your opening at the floor, middle, and ceiling. Walls are rarely perfectly straight or plumb, and the narrowest measurement dictates the maximum width your doors can span.
For the height, measure floor to ceiling at both corners and the centre, using the smallest figure as your working height. Account for skirting boards, coving, or uneven flooring. If your ceiling slopes, measure at the lowest point where the track will mount and confirm your chosen door height clears it.
Finally, check the opening is square by measuring both diagonals. If they differ by more than a few millimetres, your room is out of square, and you'll need to factor this into the door configuration. When in doubt, most reputable suppliers, including DoorsDirect, offer expert assistance to review your measurements before you commit.
Structural Suitability: The Checks Most Homeowners Miss
Before you pick up a tape measure, confirm your wall and ceiling can physically support a sliding door system. This step separates a smooth installation from a costly structural surprise.
Ceiling type and joist location. The top track carries the entire door weight, so it must anchor into something solid, usually a timber joist above the opening. Use a stud finder to locate joists and mark their positions. If no joist is in the right place, fit a timber spreader plate (18mm ply or similar) across the joists, or use heavy-duty cavity fixings rated for the door weight. Standard plasterboard fixings are not adequate for the weight of sliding doors (diydoctor.org.uk).
Wall construction and fixings. The bottom track or floor guide needs a secure fixing too. On solid brick or block walls, standard wall plugs and screws are fine. On a stud wall, locate the timber uprights and screw into those. If fitting into a recess with plasterboard walls on both sides, check the stud positions, if not where you need them, add noggins (horizontal timber braces) between the studs before fitting.
Floor level and covering. Sliding doors run on a bottom track or guide on the floor. If your floor is uneven, common in older properties with suspended timber floors, the doors will bind or drift. Check the floor with a spirit level across the full width of the opening. If there's more than a 3-4mm drop, pack the track with shims or have a joiner level the floor first. Also consider your floor covering: thick carpet or a deep pile rug can interfere with the bottom guide, so measure after the floor is finished, not before.
Ceiling height and headroom. Standard sliding door systems need around 70-100mm of clearance between the top of the door and the ceiling to fit the track and allow the doors to be lifted into place. Low ceilings, coving, or protruding cornices can reduce usable height and affect which door sizes are possible.
What to do if your measurements are borderline. If your opening is out of square by more than 5mm, or your ceiling is more than 10mm out of level, don't assume the doors can simply be adjusted. Sliding doors have limited roller adjustment, usually around 10-15mm of vertical travel. Beyond that, correct the underlying issue before fitting. A professional fitter will flag this during a site survey; if you're going DIY, factor in the cost of packing pieces, shims, or a spreader plate before you order.
Checking structural suitability alongside your measurements avoids the most common cause of failed installations: doors that arrive on time but can't be safely fitted because the ceiling or wall wasn't up to the job. This is where a professional fitting service earns its keep, not just for the labour, but for the expert eye that spots these issues before they become expensive problems.
The Sliding Wardrobe Installation Process Explained
Understanding the sliding wardrobe installation process helps you know what to expect, whether hiring a professional or fitting the doors yourself. A professional fitter will usually complete the job more quickly thanks to experience and the right tools.
Preparing the Space and Structural Checks
Before any track is fixed, remove existing furniture and clear the floor area. The top track must be screwed into a solid fixing, usually a timber joist or reinforced lintel above the opening. If fitting into a plasterboard ceiling, standard fixings won't hold the weight of sliding doors, you'll need heavy-duty cavity fixings or a timber spreader plate installed first.
The floor must be level for the bottom track or guide. If it isn't, pack the track with shims or adjust the door height using the rollers. Walls out of plumb need packing pieces behind the track so the doors hang vertically. Skipping these checks is the most common reason doors bind or come off their runners later.
Fitting the Tracks and Hanging the Doors
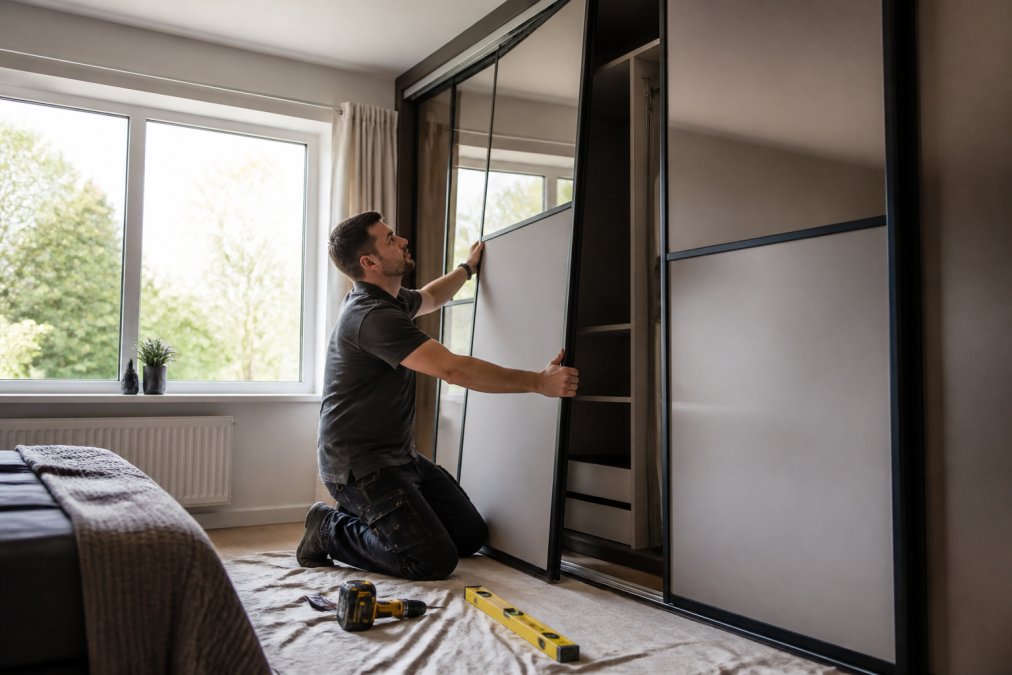
The top track is fixed first, levelled carefully along its entire length. The bottom track or floor guide is then positioned directly beneath it, using a plumb line to ensure perfect alignment. Once both tracks are secure, the doors are lifted into place, with the top rollers engaging the track before the bottom guides are seated.
Each door is then adjusted using the Allen key mechanism on the rollers to fine-tune the height and ensure the doors sit parallel with a consistent gap. Finally, the soft-brush edging strips and any soft-close dampers are fitted, and the doors are tested several times to confirm smooth operation across the full width of the opening.
DIY vs Professional Installation: A Cost-Benefit Analysis
The biggest question is whether to fit the doors yourself or pay a professional.
DIY installation saves the labour cost, but assumes your walls and ceiling are true, you own the right tools, and you're confident working at height with heavy glass or mirror doors. A single sliding door panel can weigh 40kg or more, and lifting it into the track without damaging the edges or injuring yourself requires care and ideally a second person.
Professional installation costs more upfront but removes the risk of costly mistakes. A fitter spots structural issues before they become problems. For awkward openings, out-of-square walls, or heavy mirror doors, the peace of mind is usually worth the premium.
| Factor | DIY Installation | Professional Fitting |
|---|---|---|
| Labour cost | Free (your time) | Added to project cost |
| Tools required | Drill, level, ladder, Allen keys | Included |
| Risk of damage | High with heavy panels | Low |
| Structural issues | You diagnose | Experienced eye |
| Time to complete | Half a day or more | Usually faster |
| Warranty impact | Check terms | Often protected |
Choosing Your Made-to-Measure Doors and Interiors
The panels define the look of the room, but the interior configuration determines how useful the wardrobe is every day. Design both together, ensuring your hanging rails, drawer units, and shelf adjustment points match how you actually store clothes.
Material and Finish Options: Beyond the Brochure
Mirror doors make a small bedroom feel larger and double as a full-length dressing mirror, while woodgrain textures add warmth and suit traditional interiors. Glass-fronted options display contents while keeping dust out, and shaker-style panels bring a classic, furniture-like appearance. The right choice balances aesthetics, maintenance, and budget.
The material underneath the finish matters as much as the colour. DoorsDirect uses engineered wood products rather than solid timber. The two most common are:
- Medium-density fibreboard (MDF), Dense, stable, and with a smooth surface that takes paint and foil finishes well. It's the standard choice for painted or coloured doors. It doesn't warp easily, but it's heavy, so check your track rating.
- Particleboard (chipboard), Lighter and cheaper than MDF, but less durable at the edges. It's fine for interior carcasses but less common for door panels unless wrapped in a robust foil.
For interior carcasses, look for 18mm furniture-grade board with matching PVC edging. Thinner boards (16mm or less) are cheaper but flex more under load, especially on wide shelves. A good 2mm PVC edge protects against moisture and impact far better than a thin melamine edge that chips easily.
Sustainability and Material Sourcing: What to Ask Your Supplier
Eco-conscious homeowners increasingly ask where their wardrobe materials come from, and answers vary significantly between suppliers. Most fitting services and retailers stay silent here, so asking the right questions can set your project apart.
Look for FSC or PEFC certification. The Forest Stewardship Council (FSC) and the Programme for the Endorsement of Forest Certification (PEFC) are the two main certification schemes for responsibly sourced timber. If a supplier's boards carry either logo, the wood fibre comes from a managed forest rather than an illegal or unsustainable source. Many board manufacturers, including Egger, offer FSC-certified lines, but not every retailer specifies which they use. Ask directly before you order.
Check the adhesive and finish VOC content. Volatile organic compounds (VOCs) are released from glues, paints, and foils during manufacturing and can off-gas into your bedroom for weeks after installation. If you're sensitive to smells or fitting a wardrobe in a child's room, ask for panels with low-emission (E1 or better) classification.
Consider the lifespan. The most sustainable wardrobe is the one that lasts 20 years without needing replacement. Choose a track system with replaceable rollers and soft-close dampers, and an interior configuration you can reconfigure as your storage needs change. A cheap wardrobe that warps or sheds its edging within five years ends up in landfill, far worse than a slightly more expensive unit that endures.
Recyclability at end of life. MDF and particleboard are difficult to recycle because of the adhesives used in their manufacture. Some manufacturers now use boards with lower formaldehyde content or alternative binders that are easier to process. If end-of-life disposal matters to you, ask whether the panels are classed as recyclable or need to go to general waste.
Designing the Interior: Storage That Matches Real Life
Inside, think about what you're storing. Long hanging rails for dresses and coats need full height, while folded knitwear suits adjustable shelves. Drawer units are essential for smaller items, and shoe racks make use of otherwise wasted floor space. At DoorsDirect, our interior storage sets are built from 18mm furniture-grade Egger board with matching 2mm PVC edging, designed to work with our sliding doors and customisable to your needs. If you have an unusual layout, send us your dimensions and we'll quote a configuration to suit.
Audit your wardrobe contents before you order. Consider the following for a two-person wardrobe:
- Two full-height hanging rails for coats, dresses, and suits (around 1000mm of rail each)
- Two half-height rails for shirts and trousers (around 600mm each)
- Four to six adjustable shelves for knitwear, bags, and linens
- Two to three drawer units for underwear, accessories, and small items
- One shoe rack or pull-out basket for footwear
This configuration uses the full height of the wardrobe rather than leaving dead space above a single rail, and lets you adjust shelf positions as your wardrobe changes.
Considering material provenance, finish chemistry, and real storage habits together makes a choice that's better for your home, your wallet, and the environment, and avoids the common mistake of choosing doors on looks alone, only to discover the interior doesn't work for how you actually live.
Conclusion: Book Your Sliding Wardrobe Fitting Service
A well-planned, professionally fitted sliding wardrobe adds real value to a home, turning wasted wall space into organised, accessible storage. The key is to measure accurately, choose a configuration that matches both your room dimensions and your storage habits, and decide honestly whether DIY is within your capabilities.
At DoorsDirect, we support you from measurement to final fit. Every set of made-to-measure sliding wardrobe doors passes through a three-stage quality check and is backed by a ten-year guarantee, with nationwide delivery and expert advice available whether you're a homeowner, a joiner, or a developer. Order your custom sliding wardrobe doors today and build the storage space your bedroom deserves.
Frequently Asked Questions
How much does it cost to have sliding wardrobes fitted?
The cost depends on the configuration and if you choose DIY or professional installation. For example, a made-to-measure Custom 2 Door Sliding Wardrobe set from DoorsDirect starts at £538.00, with interior storage solutions from £478.00. Hiring a professional fitter adds labour costs, which vary by region and complexity. The best way to get an accurate figure is to measure your space and request an instant quote for the specific doors and interiors you need.
What does the sliding wardrobe installation process involve?
The process starts with measuring the recess and checking the wall and ceiling are sound and level. You then assemble the interior carcass, fitting end panels, dividers, shelves, and hanging rails. The next step is fixing the top and bottom tracks securely, ensuring they are perfectly aligned. Finally, you hang the doors, adjust the wheels for a smooth glide, and fit soft-close mechanisms if included.
How do I measure for sliding wardrobe doors?
Measure the width of the recess at the top, middle, and bottom, then use the smallest measurement to ensure the doors fit. For the height, measure from the floor to the ceiling at several points, again using the shortest distance. You must account for the thickness of any carpet or flooring. Always use a metal tape measure and record dimensions in millimetres. If you are unsure, DoorsDirect offers expert guidance from measurement to final fit to help you avoid costly mistakes.
Are made-to-measure sliding wardrobes worth the investment?
Yes, particularly for awkward spaces like alcoves, loft conversions, or rooms with sloped ceilings where freestanding furniture cannot fit. Made-to-measure sliding wardrobes use the full floor-to-ceiling height and width of your room for storage, maximising space. They are built with quality components like soft-close technology and 18mm furniture-grade board, ensuring durability. A professional sliding wardrobe fitting service ensures a perfect finish, and with a 10-year guarantee, it is a long-term home improvement that adds value rather than a temporary fix.
Leave a comment